|
The QWERTY Standard PC Keyboard
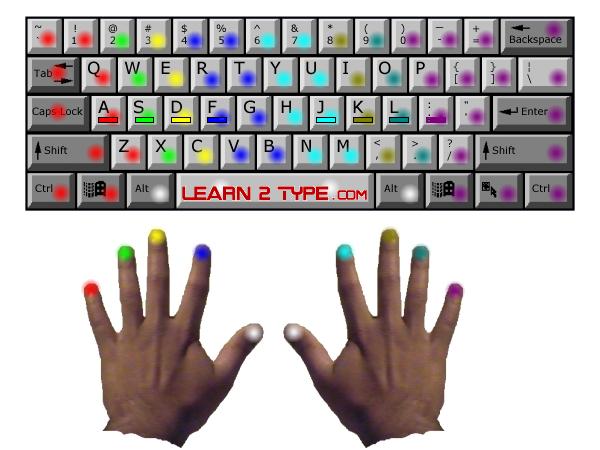
Lightly place the tips of your fingers on the home keys as shown in the illustration below. Left hand pinky finger on the A key and the other fingers on the S, D and F keys. Right hand pinkie finger on the ; (semi-colon) key and other fingers on the L, K and J keys. Some keyboards have helpful "bumps" on the F and J keys, to allow you to quickly position your fingers by feel.
The fingers used for pressing each key are shown below, marked by colored dots. When using the SHIFT or CONTROL keys, it is easier to use the opposing hand from the letter (or command key) you will be pressing. For example, for uppercase A press and hold the right side SHIFT key with your RIGHT HAND pinkie finger, and press the A key with your LEFT HAND pinkie finger. Your thumbs are used in a similar way, you can use either RIGHT or LEFT thumb to press the SPACE BAR and ALT keys.
You may want to print this page out for future reference.
NOTE: some keyboards may have different positioning for a few of the symbols. Simply substitute the symbol on the color coded chart, as long as the letters are all in the correct place this should not be any cause for concern. If your keyboard has a completely different layout, you can select the correct type at the top of this page.

|
<<<previous lesson Basics 1 |
Typing Lesson List
| next lesson Basics 3>>>
|
|
|
|
| |